
Custom Built-In Cabinets
There was a small dining room that we decided to turn into an office. One wall had a recessed section and my wife had this amazing vision to put built-in cabinets with concealed shelves there. Since the depth was custom and different than stock cabinets at local stores, I decided to make them. Custom Built-In Cabinets DIY style.
I would normally use an oak or maple for the cabinet faces, but decided to go with white pine. This would be a little cheaper and easier to work with. Since Pine is a softwood, it can get damaged easily, but for cabinets in an office, that were used infrequently, it was going to work fine.

Body (Carcass)
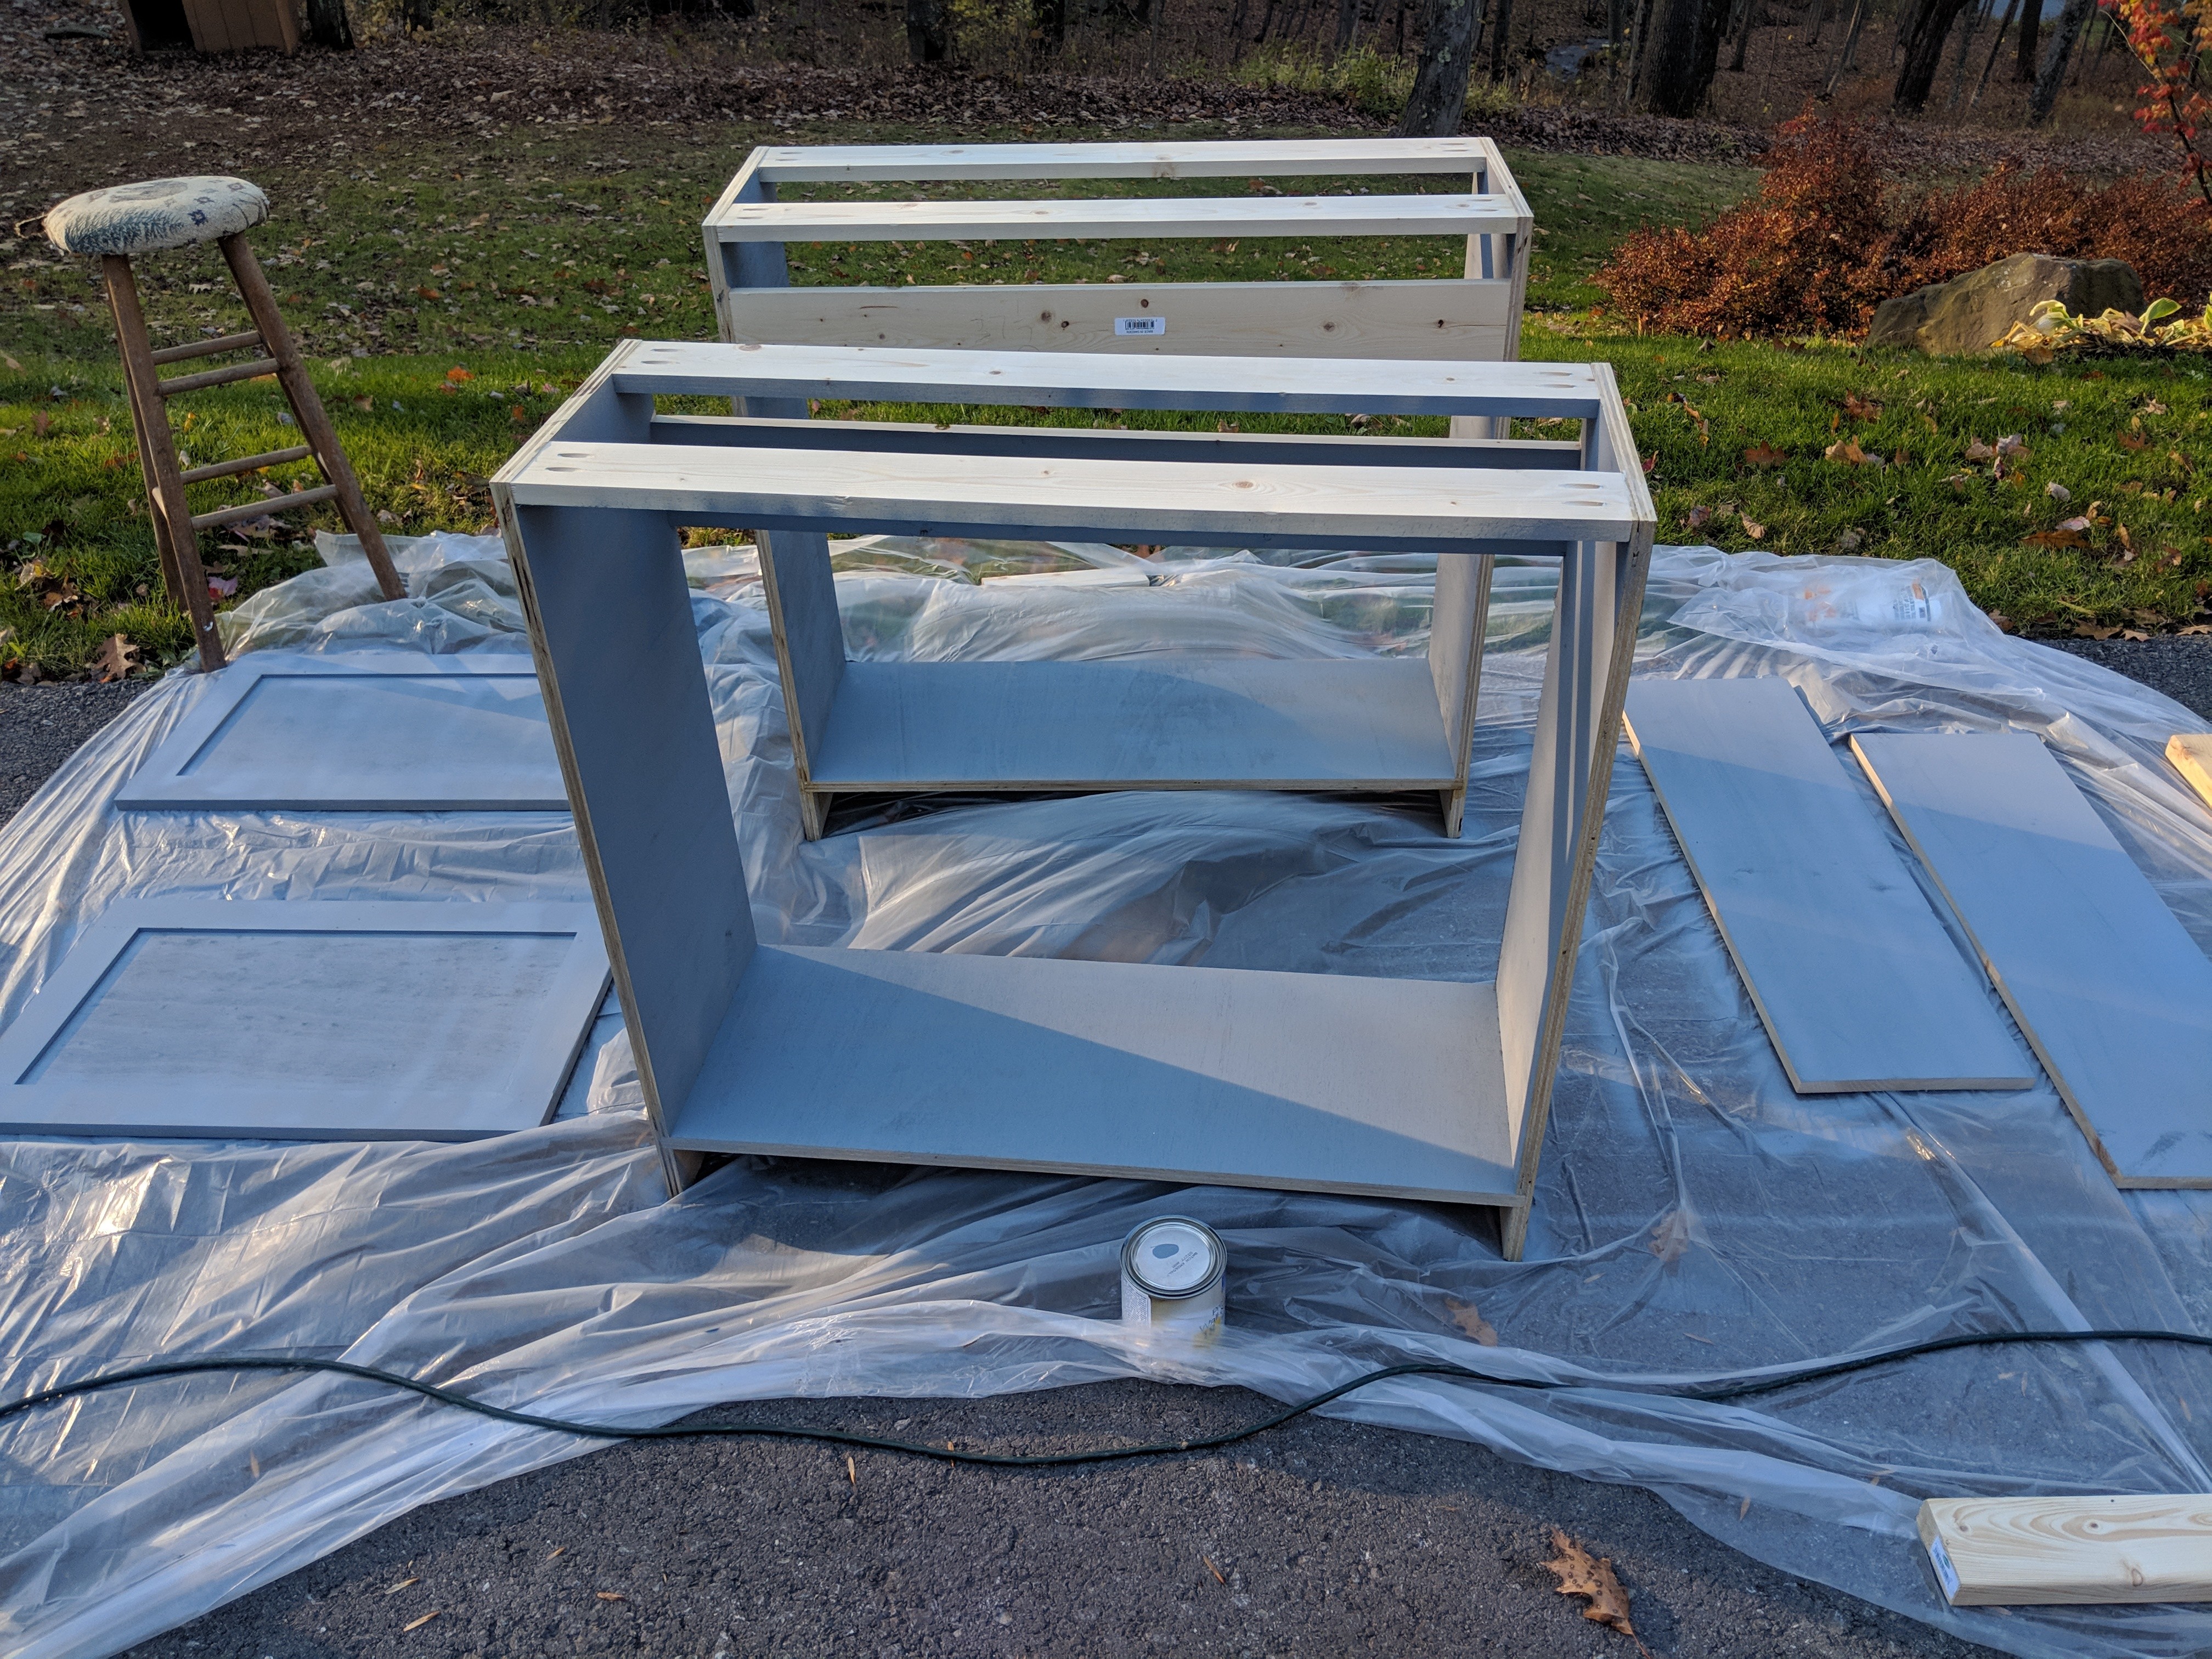
I measured the space and had two options: build one big frame or two smaller frames. After lots of research, I went with two carcasses. This would allow me to adjust them, if necessary, after building them because walls are usually not straight and I sometimes don’t cut straight.


The sides and bottom were made out of cabinet grade plywood. You can use any plywood, but better plywood makes for a nicer looking finished product. Also there will be less chance of running to an empty pocket in the plywood. After cutting the plywood to size, a dado or trench was cut in each side piece where the bottom shelf slide in to join the two side pieces together. A dado joint creates a strong joint especially with wood glue. Next, I used pocket holes (Kreg Jig) to attach the back stretcher (piece of wood on the back) and the top stretchers (two pieces of wood on top.) I made sure that the entire frame was square while screwing everything together. Checking for square
 The stretchers were made with 1″ x 4″ pine. You can go cheap on the carcass as long as it is sturdy and straight. Make sure they are flush the back and top or there could be issues with the counter or attaching to walls during install.
Face Frame
The face frame is what frames the front of the carcass and basically create the border around the cabinet doors. A face frame is front facing and helps hide flaws with the carcass, so you want to make sure it looks good. This is why I went through a lot of wood to find the perfect pieces of pine.

The bottom, horizontal piece needed to be a little higher to cover the bottom shelf of the carcass so I went with a 1″ x 5″. The face frame helps create the separation of cabinet doors so I wanted to make sure it covered the bottom space between the floor and the bottom shelf of the carcass. After determining how wide I wanted my cabinets to be, I attached the vertical rails to the top and bottom. I used 1″ x 3″ pieces of wood for these, except for the middle piece was a 1″ x 4″. I did not want the top or side to overhang the carcass so I measured to make sure it would be flush.

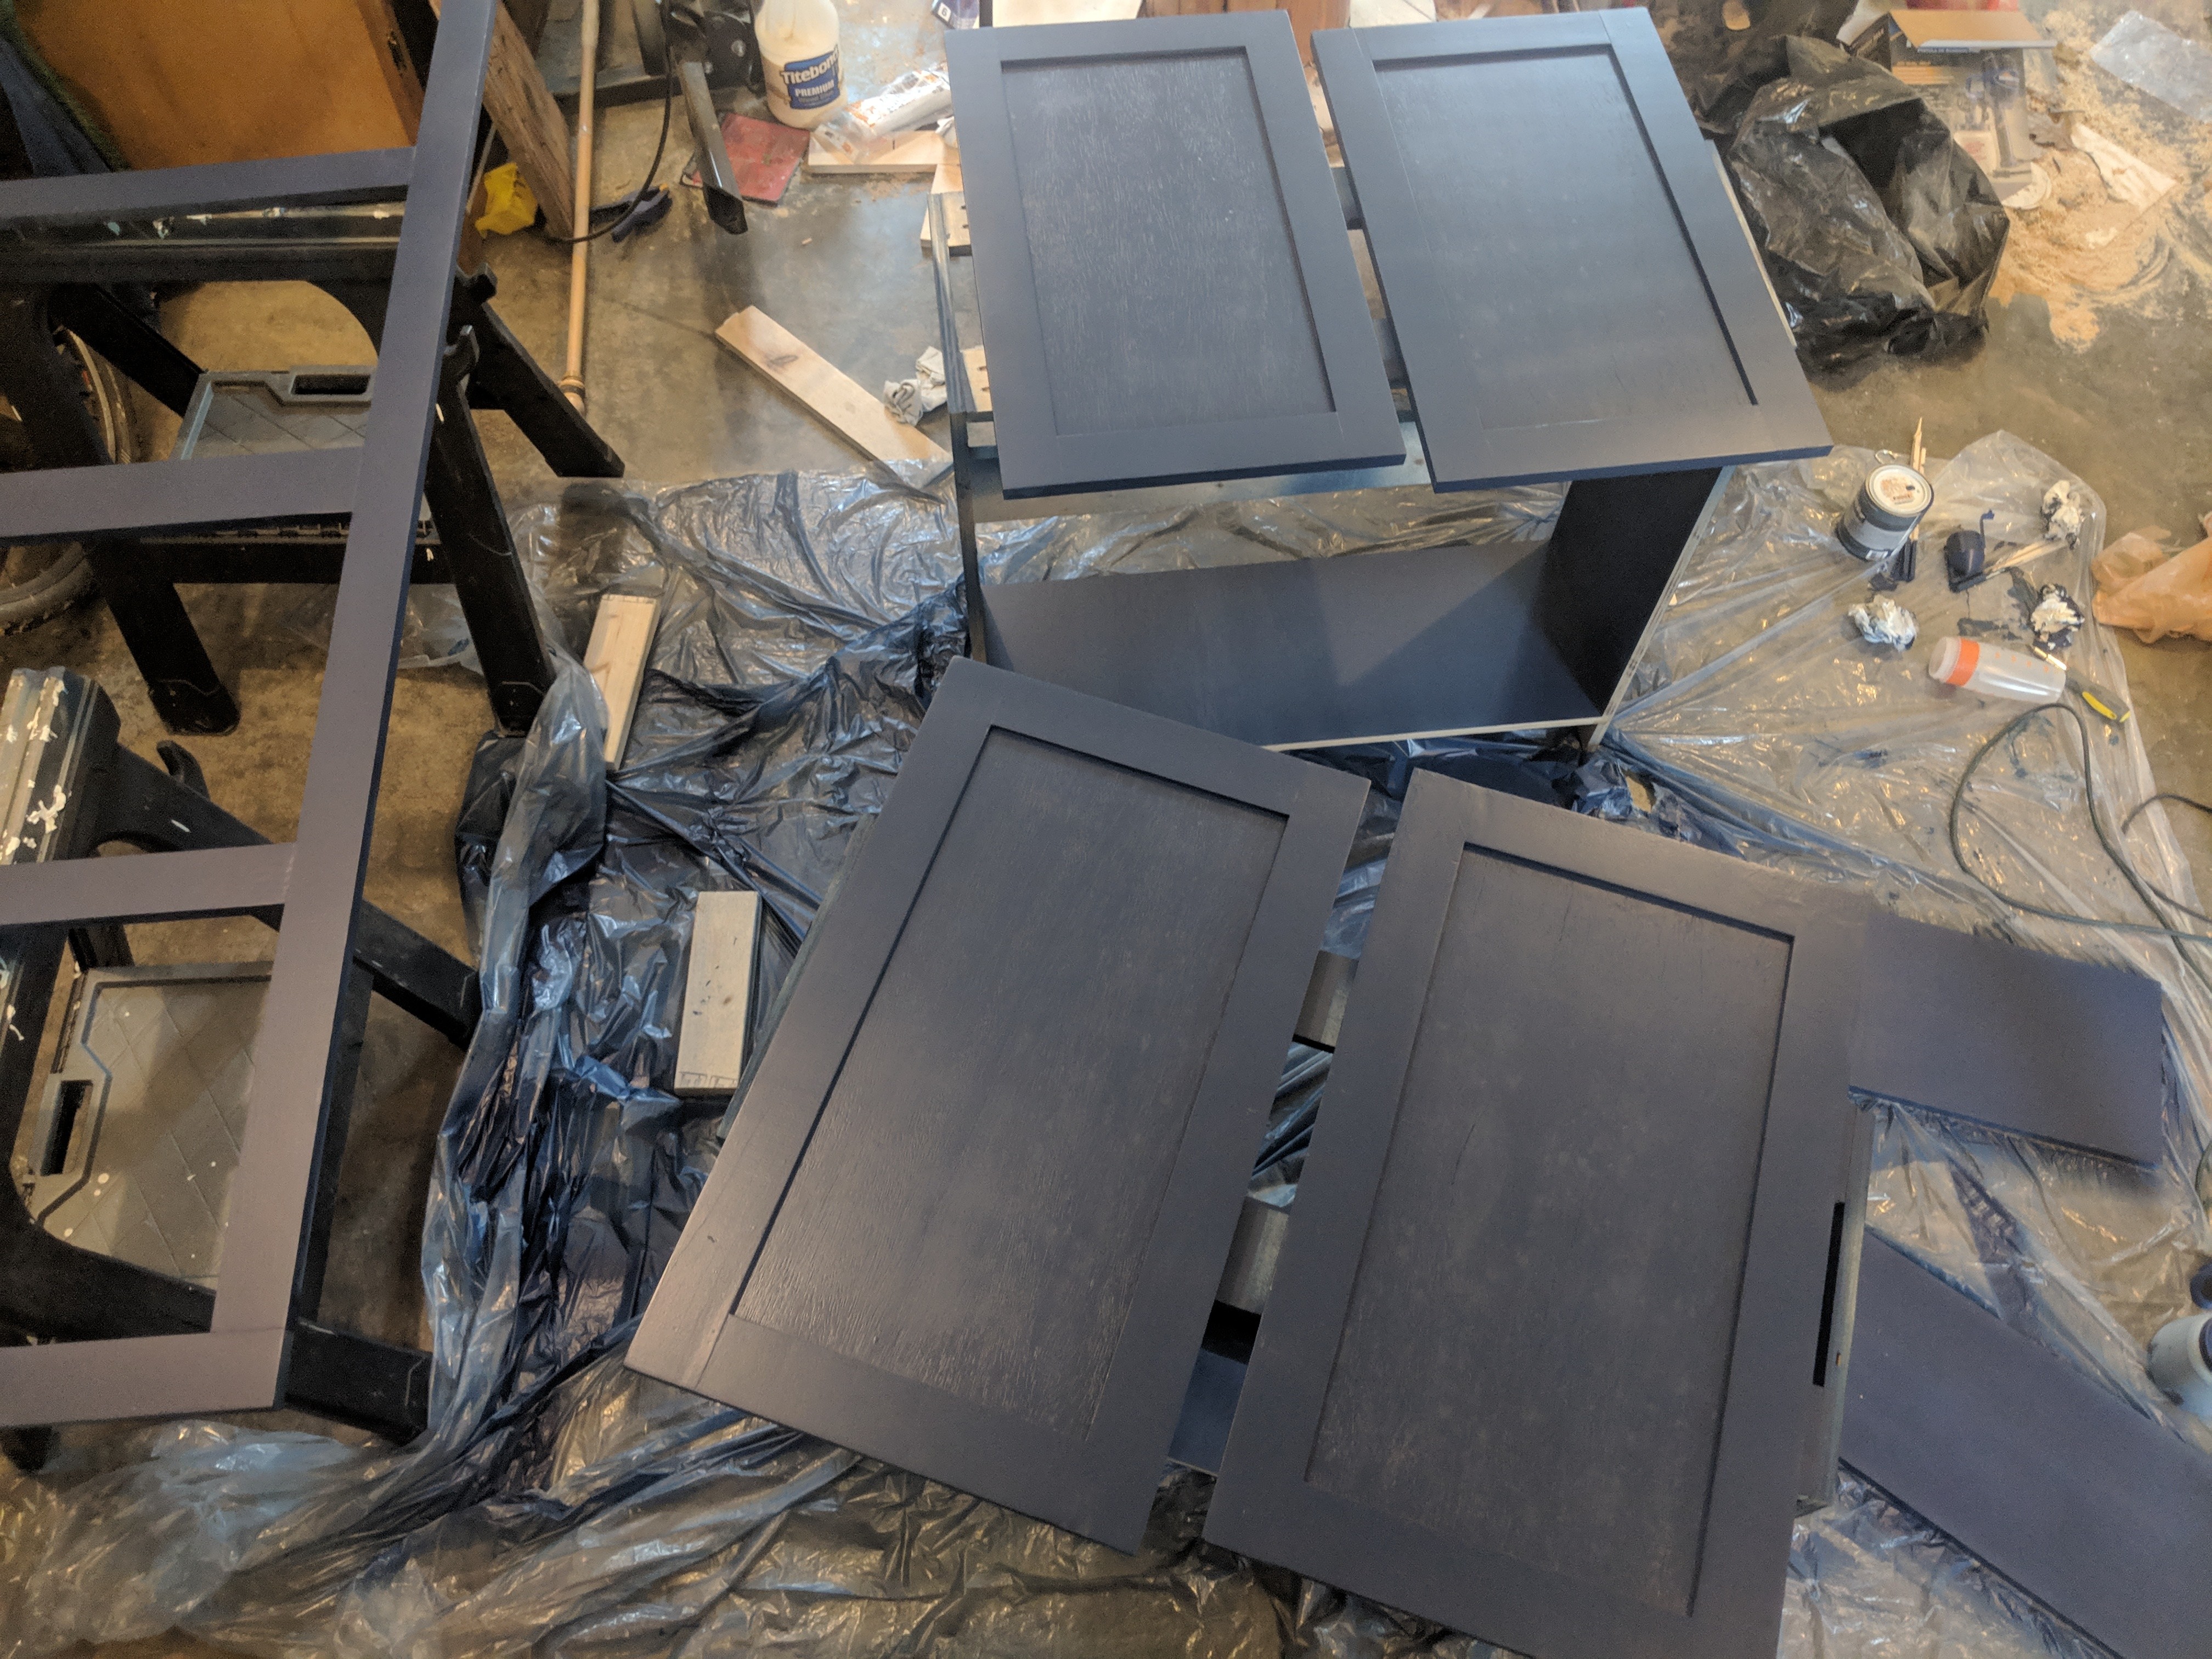
Cabinet Faces
The cabinet faces are the main attraction. These are what everyone looks at, along with the face frame. There are many ways to put a cabinet face together (pocket holes, butt joints…), but I used rails and stiles. I measured how tall and wide the doors should be based on the openings in the face frame (see section above.)
The cabinet overlay needed to be determined. This is the part of the cabinet that hangs over or covers part of the face frame. I chose a 3/4″ overlay since I was using 1″x 3″ stiles. This would cover more of the face frame and, in my opinion, look better because of the taller doors.
To create the cabinet, I used the table saw to create a 1/4″ groove in the stiles (vertical pieces) and the rails (horizontal pieces.) This would allow me to glue and insert the panel in the middle, which was 1/4″ cabinet grade plywood. The pieces were glued together, clamped, checked to make sure they were square and left overnight to dry.
Note: After I had put the cabinets together, a friend recommended that I stain or paint the middle panel before glueing the cabinet together. This would prevent non-colored wood from showing as the cabinet expanded and contracted over time. Good to know moving forward. Thanks Bryan S.
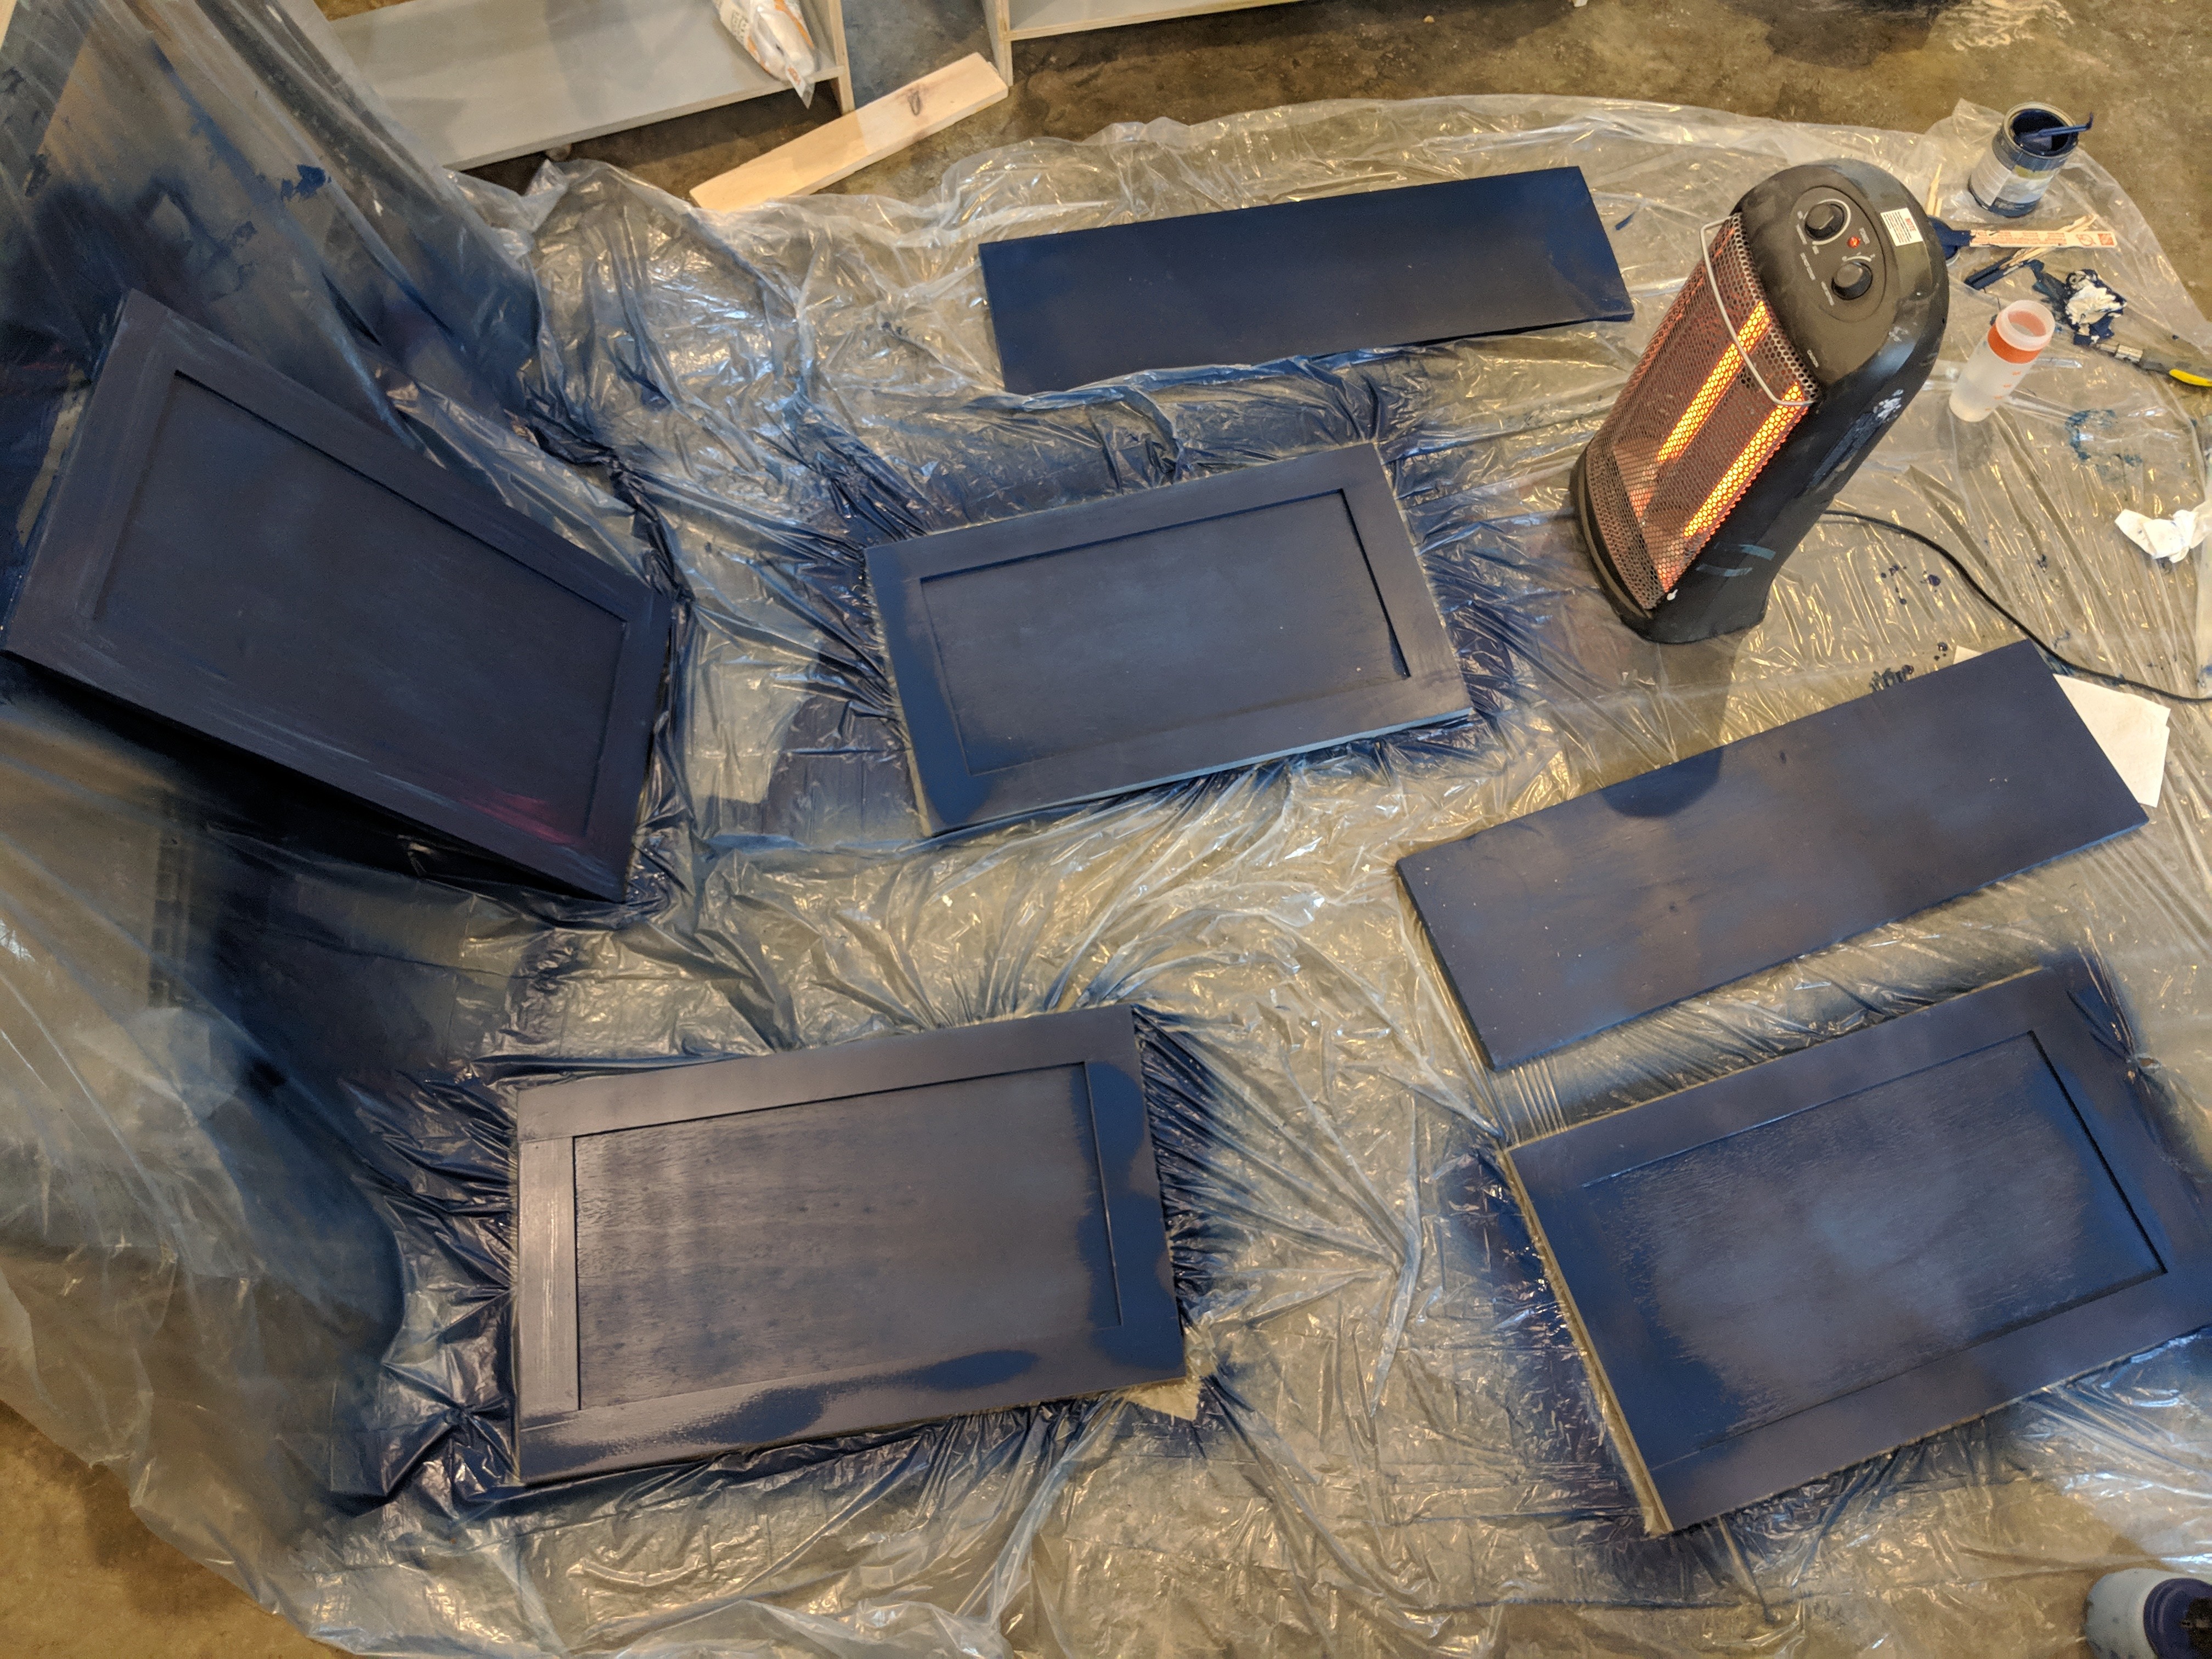
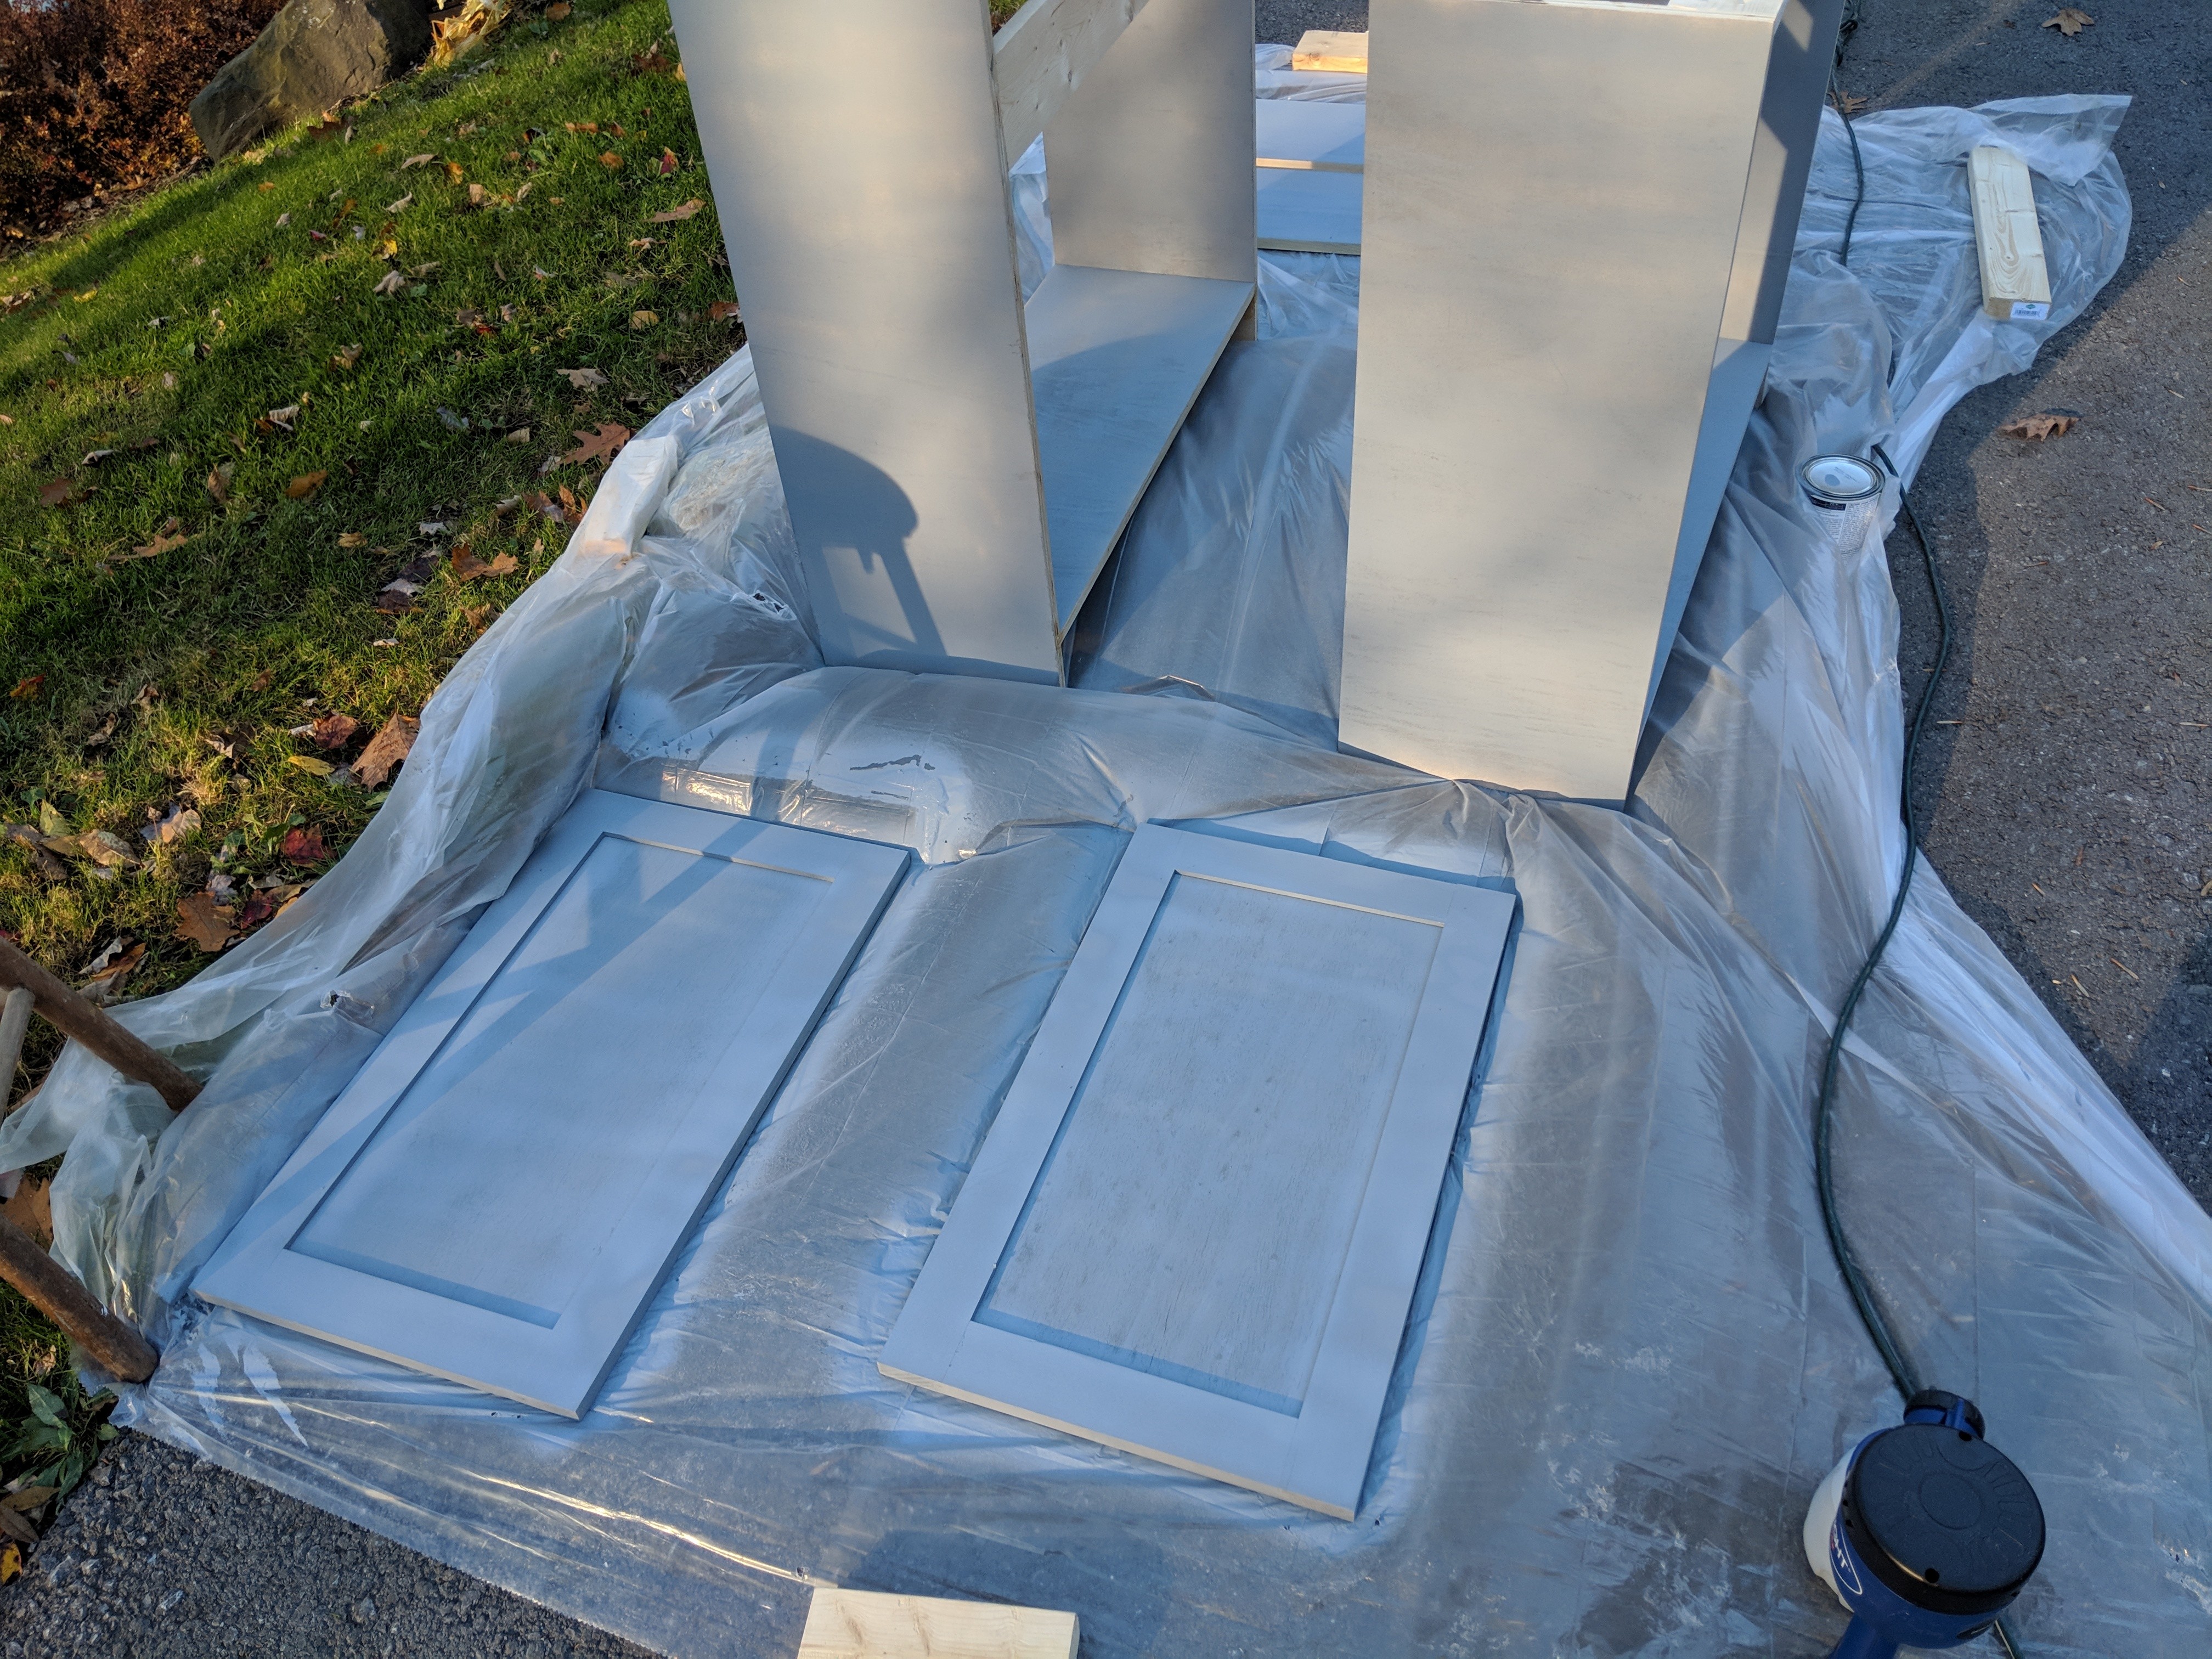
Painting
The final build step was to sand and paint everything. Instead of using a paint brush, I picked up a paint sprayer. It didn’t take long to get used to it. By using a sprayer, I was able to put nice, even coats (multiple) of both primer and paint on the cabinets. Paint had to be cut with a little water, but every sprayer is different. A knowledgeable employee at Sherwin Williams explained what we needed to do and it made things a lot easier. (Paint Sprayer)

Install Time
I brought the two carcasses in and butted them up against each other.  I was glad that I made two structures instead of trying to make one big frame to fit specifically in that area. I had to move them around to get the perfect fit and level. They were then screwed them into studs in the back wall through the back stretchers. The sides were also screwed to side wall studs.
To install the cabinet doors, a concealed hinge jig (Kreg Jig) was used to create the holes for the concealed hinges. I measured the center of the holes to be 4 inches from the top of the cabinet and also at the bottom since I was using two hinges and my cabinet doors were tall. In the articles I read and the videos I watched, people put them anywhere from 1.5″ – 4″ from the top and bottom, all dependent on the size of their cabinets and what type of cabinets they were. Next, the hinges were installed, cabinets were centered in their respective location and screwed into the side of the face frame to attach them. I had to adjust the hinges a little to get them straight and matched up, but it was fairly easy. The Kreg Jig made things very easy. They make great products to make life easier FYI.
For the shelf, we used a 2″ x 12″ piece of Douglas Fir. I liked that it was a soft wood, but hard-ish feeling. The shelf was stained with Minwax Gel and several coats of Poly, then installed on top of the cabinets. Something I learned that is supposed to help with the shelf expanding and contracting over time; drill holes, in the stretchers (top pieces of wood), bigger than the screws being used and use a washer to to help screws create a tight fit. To try to clarify, from the inside, I drilled 3/8″ holes and then used 1/4″ screws to screw stretcher to the bottom of shelf. The washer helped keep everything tight, but also allow the wood to shrink and expand.
Final Pictures (with concealed shelves)
I bought the concealed shelf brackets from Dakoda Love. They also have concealed shelves if you do not want to make them yourself. American made and they are very good with responding to questions or concerns.
If you have any questions please ask in the comments below. I will be happy to answer anything I can.


Thanks for reading.